
Git with SSH Keys

When working with Git via command line, the easiest way to authenticate is with x.509 keys. This article will show you how to set them up.
Introduction
With GUI-based Git clients, such as GitHub Desktop and SourceTree, authentication is managed by the applications themselves with little to no user input required.
However, sometimes you may want to use the power of the command line, in which case it is useful to have SSH keys set up.
SSH Key Location
SSH keys are stored at the following locations depending on the operating system and/or the user.
On Linux - assuming you are not using the root user ;-)
/home/<user>/.ssh
or
Root user
/root/.ssh
Both of these can be shortened using the tilde ~, which is a shortcut for home. You can use tilde with many commands to save you from typing the full path. For example, you could have cd ~ that would take you to your home directory. The two commands mentioned above could be shortened to the following.
~/.ssh
On Windows, the typical location for SSH keys is
C:\User\<username>\.ssh
Listing Keys
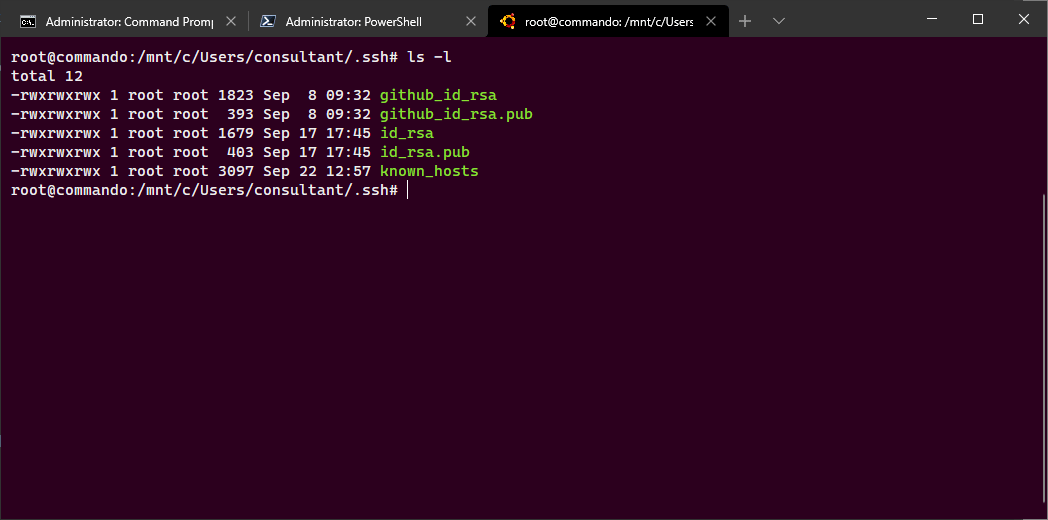
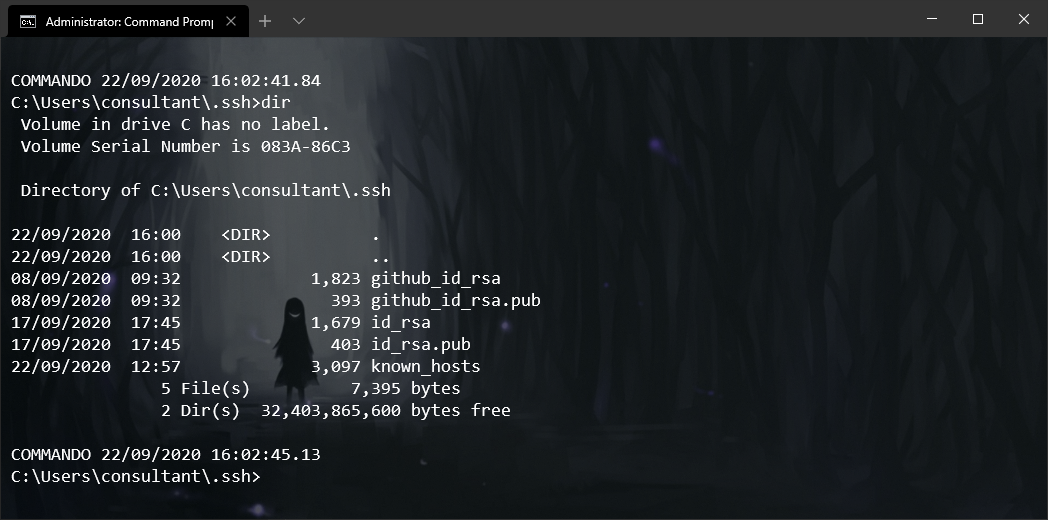
Now that we have learned where the SSH keys are stored on our system let us look at how we can list the contents of this folder.
Linux
ls -l ~/.ssh
Windows CMD
dir c:\users\<username>\.ssh
Windows PowerShell
Get-ChildItem C:\Users\<username>\.ssh
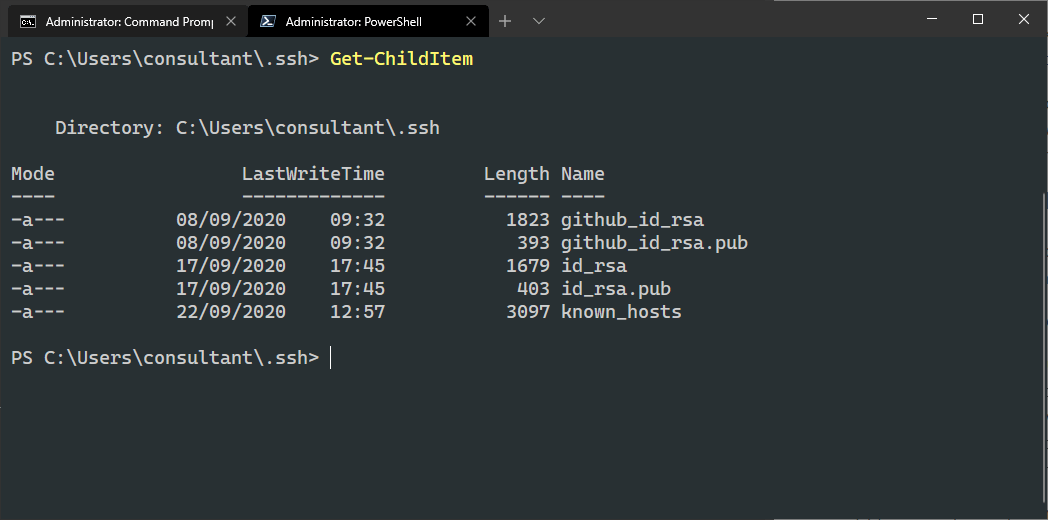
Note It is quite common to have multiple keys in this folder as keys can be used for many things other than Git.
Existing SSH keys
If you are learning about SSH keys and using them to authenticate to Git Repositories for the first time, the above folders likely are empty on your system. In this case, please take a look at the screenshots above. You will notice that the keys are named in pairs; one key ends in the .pub extension, and the other has no extension at all.
The file ending in .pub contains the public key, while the other file contains the private key. The private key should never be shared anywhere. If you lose your private key, you will need to regenerate a new private/public key pair, as authentication cannot be successfully completed without both parts.
It should be noted that you can regenerate a public key with just the private key; however, you cannot generate a new private key from a public key.
Generating Your First SSH Key-pair
To generate a brand new key pair, you can use the SSH keygen command ssh-keygen, which is available on most versions of *nix, Mac OS, and Windows with either the Windows Subsystem for Linux (WSL) or the Git Windows Desktop package.
Here’s the command you want to use
ssh-keygen -t rsa -b 4096 -C "<comment>"
| Option | Description |
|---|---|
| -t type | The type option states the type of encryption to use. The possible values are “dsa”, “ecdsa” or “rsa”. Please note this is RSA version 2; for RSA version 1, you need to change this to “rsa1”. |
| -b bits | This option specifies the number of bits in the key to create. For RSA keys, I like to use 4096 bits, the default is 2048, and the minimum is 768 bits. When working with DSA keys, it is important to note that the DSA keys must be exactly 1024 bits. For ECDSA keys, the -b flag determines the key length by selecting from one of three elliptic curve sizes: 256, 384 or 521 bits. Attempting to use bit lengths other than these three values for ECDSA keys will fail. |
| -C comment | Allows for a comment to be added to the public key |
Note The comment field is typically filled in with the key owner’s email address, but it can actually be anything you want it to be. You could enter a random string or a note about the client device or service being used. It is, however, recommended that you do not enter vague or unclear content in this space and instead use something that will allow you to identify the owner/purpose of the keys years down the road.
After we have decided on a specific type, bits, and comment text, we are ready to generate our keys. Upon typing the command and hitting enter, the first thing you will be asked is where you would like to store the newly generated keys. Typically, you are advised to store the keys in one of the default locations, which we looked at earlier with the suggested id_github_rsa.
Next, you will be asked if you would like to add a passphrase. The purpose of the passphrase is to encrypt your private key. Encrypting the private key makes the file useless in case the key is compromised. It is not unusual for computers to be lost or stolen or for old hardware to be decommissioned without the hard disc being wiped.
The passphrase is needed to use the encrypted key. Some less security-conscious users often state not seeing the point of using SSH keys when they will still have to type in their authentication credentials each time, and as a result, will often leave the passphrase blank. This is the wrong way of looking at the purpose of SSH keys. The passphrase acts as a separate factor of authentication. Keep in mind that it is much more difficult to brute-force an SSH key than it is a password; however, on its own, the key may be vulnerable to theft, and so the password is its last line of defence.
Adding SSH Keys to Git
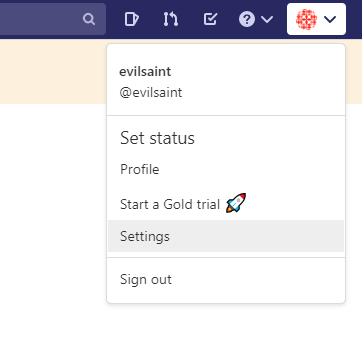
As shown in the pictures below, setting up Git to work with SSH keys is a similar process on Github and Gitlab.
Gitlab
First, let us look at Gitlab.
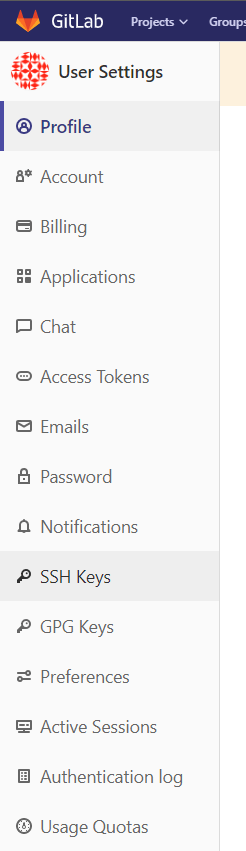
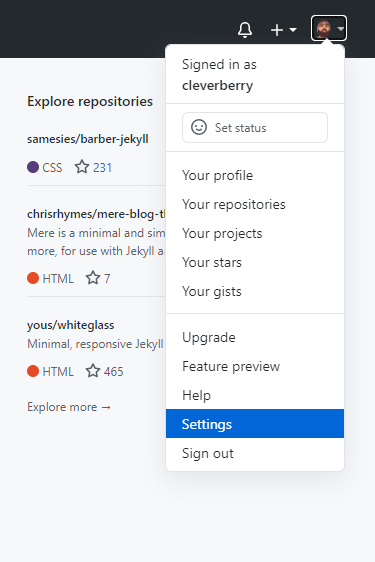
Click on the profile icon in the top right, and a drop-down menu will appear. Select the menu item “Settings”.
Another menu should be located on the left-hand side of the settings page. On it, click on the “SSH Keys” option.
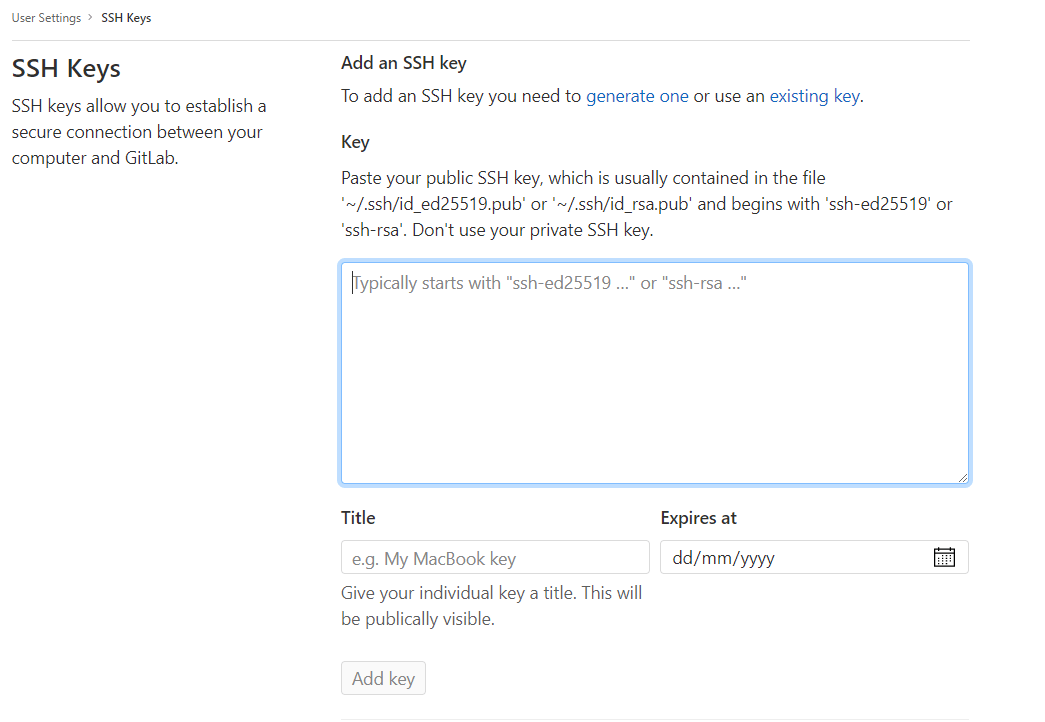
You will be presented with an input box to paste your public key (the one that ends in .pub). Paste your key into the input box and give your key a title that will allow you to recall the device or user that will be authenticated. Make sure that this is something you will remember years down the road, as it can be difficult to debug over time if you are left to analyse an ambiguous clue. Finally, you can submit an expiry date which is useful if you have third party developers or contractors working in your repository.
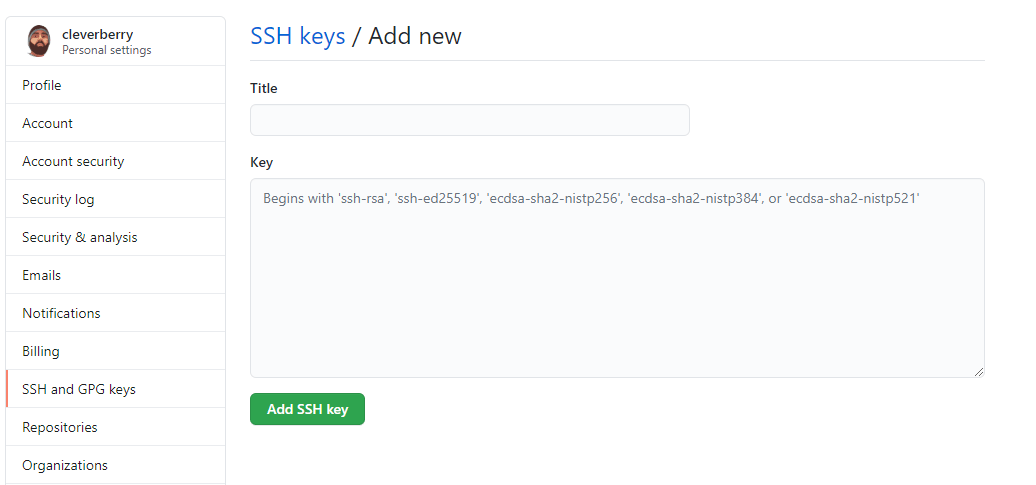
GitHub
As we will see, Github follows a similar process to that of adding SSH keys to Gitlab, albeit with an extra step.
Click on the profile icon in the top right corner, and a drop-down menu will appear. Select the menu item “Settings”.
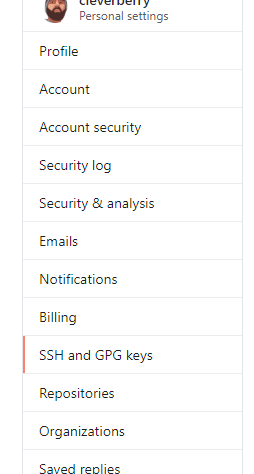
A menu should be located on the left-hand side of the settings page. Click on the “SSH and GPG Keys” option.
At this point of the Gitlab setup, we would be presented with an input field to paste our SSH key into, below which would be a list of all our existing keys. With Github, however, we are presented with a list of our existing keys and a green button that says “New SSH Key”. Click on this button, and you will be presented with an input box similar to that provided on Gitlab.

An input box to paste your public key (the one that ends in .pub) will be presented to you. Paste your key into the input box and give your key a title that will allow you to recall the device or user that will be authenticated. Make sure that this is something you will remember years down the road, as it can be difficult to debug over time if you are left to analyse an ambiguous clue. Unlike Gitlab, Github does not allow you to set a key that expires.
Using multiple keys
As I mentioned at the beginning of this article, you may have multiple SSH keys on your system. In fact, I prefer to create a new SSH keypair for each service.
Why?
If a keypair becomes compromised, it is much easier to regenerate one keypair than it is to change it in multiple locations.
It is recommended that you use a different SSH key for every service you intend to use. This makes it very easy to invalidate a key on a specific service without having to change it on all the services, should you decide to renew it either because it has been compromised / publicly exposed or for any other reason.
Anonymous
You're not logged in; your comment will be anonymous.
Log in here to post from your account, or via your social media account:
0 comments
