
IP Sec - Introduction Part 2

Let us go over a summary of the points we covered in the introduction.
- IKE is an implementation of the Internet Security Association Key Management Protocol (ISAKMP) along with the use of Oakley and SKEME protocols.
- IKE communicates through UDP port 500.
- IKE authentication methods support pre-shared keys, public-key encryption, and digital signatures.
- IKE uses a two-phase process to establish the IPsec SA.
- IKE phase one authenticates the peers who establish an ISAKMP SA, which is used during Phase two. The second Phase establishes an IPsec SA;
- IKE phase one can run in two modes, “main mode” or “aggressive mode”.
- Phase two only has a single mode called Quick mode.
Phase one, as mentioned, can be run in two modes called “main mode” or “aggressive mode”. When testing IPsec VPN systems, we will primarily be dealing with IKE phase one as Phase two is only accessible upon successful authentication.
“main mode” or “aggressive mode”
Main Mode
- Six messages are sent in total.
- The expensive DH computation is not performed until after the first packet is exchanged, and the peer IDs are passed encrypted not in the clear.
- Due to the way it is calculated, it is not possible to use the “main mode” with pre-shared key authentication unless the IP address of the initiator (client) is known beforehand. Client IPs are usually dynamic in remote access situations.
Aggressive mode
- Optional, so not all VPN services will support it.
- Only three messages are sent in instead of the six used in “main mode”, which reduces the time required to complete Phase one exchange, but it impacts security integrity because the peer ID is passed in the clear, not encrypted.
- This mode is generally used in a remote access VPN solution.
- Aggressive mode is susceptible to resource exhaustion because the expensive DH computation must be performed immediately after receiving the first packet.
Configuring IPSec
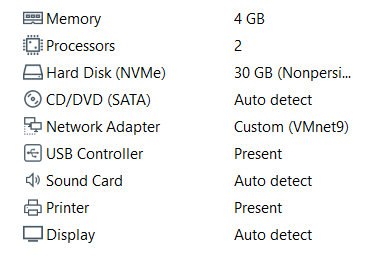
Lab Nine in La Maison de saint is the following setup: a Windows Server 2016 and a Windows 10, 64-bit operating system. It can be seen in the screenshot that both machines have non-persistent hard disks and have their operating system build numbers in their title. They are both set up on their own VM Net Number.

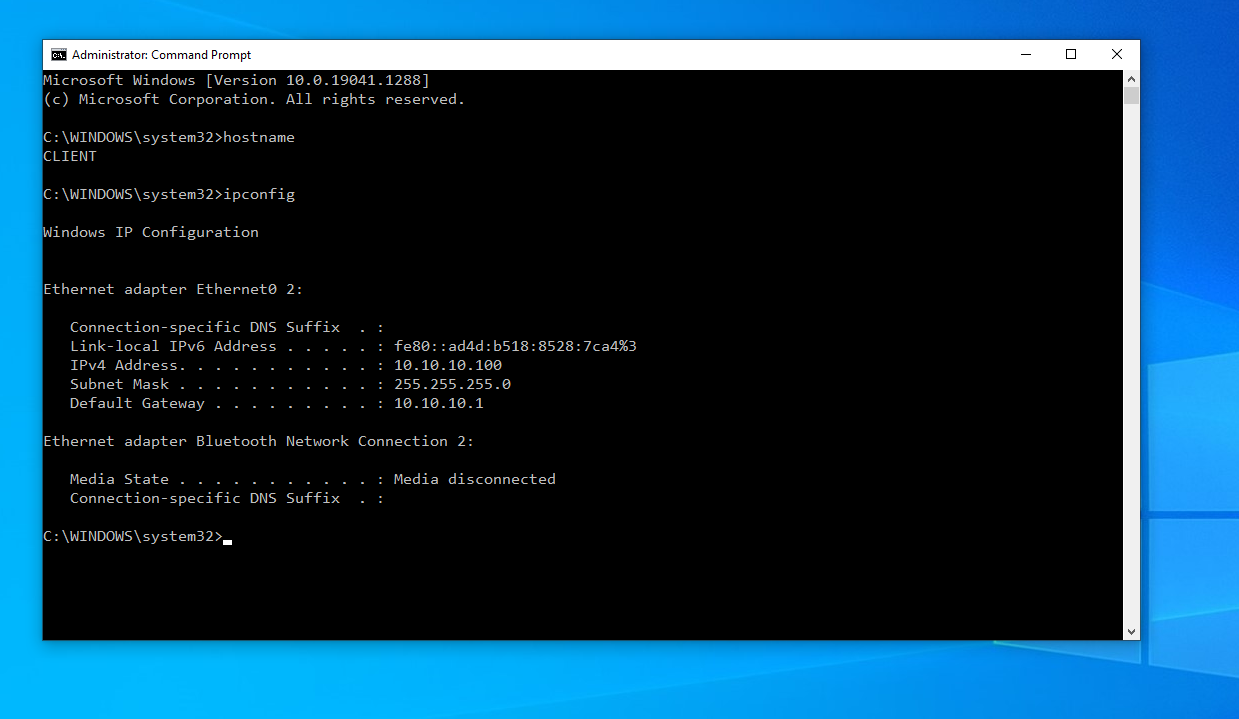

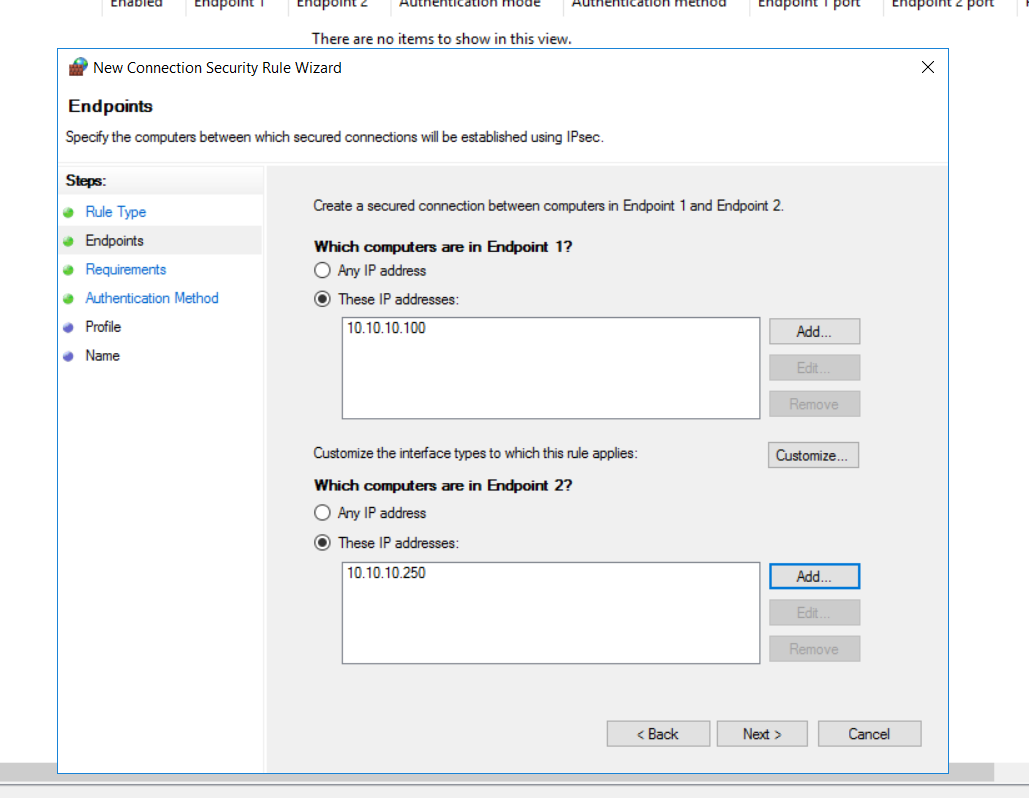
Initial configuration if we look at the above screenshots, we can identify the two machines’ hostname and IP address. The windows 10 machine is called “client”, and the Windows Server machine is called “server”. These are on IP 10.10.10.100 and 10.10.10.250
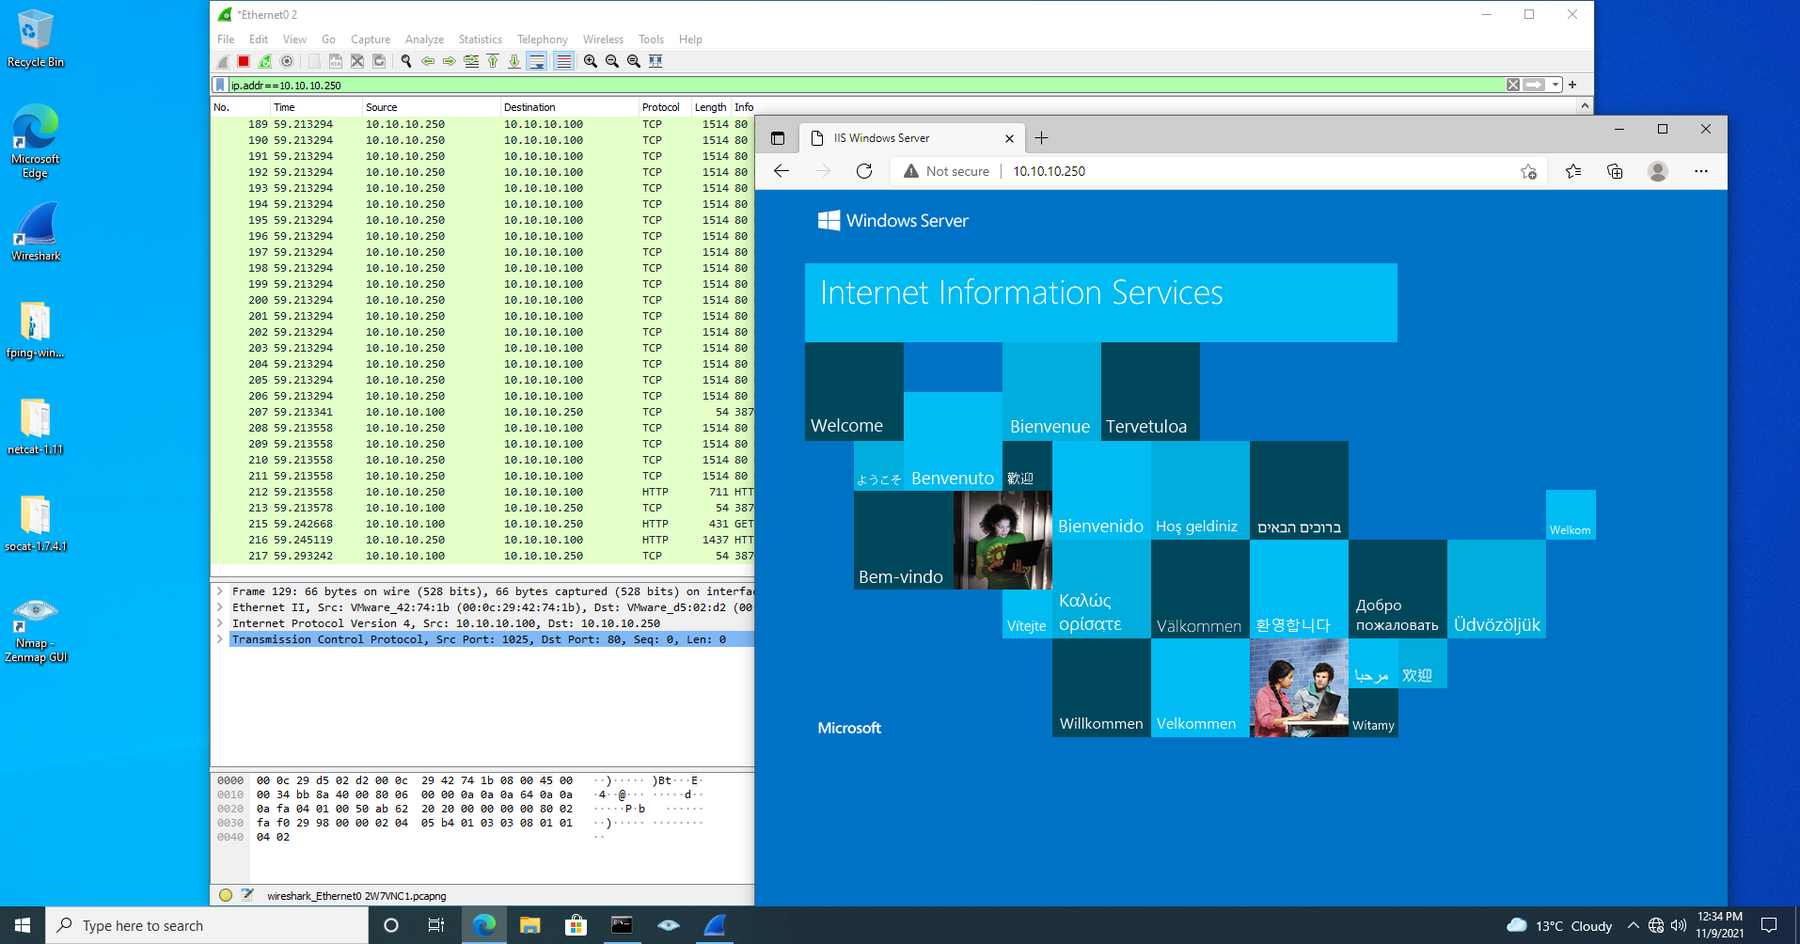
There is an IIS default web application on port 80 of the server that we will connect to test the IP Sec configuration. The below screenshot shows the connection to the web application and a blend of TCP and HTTP traffic showing up in Wireshark.
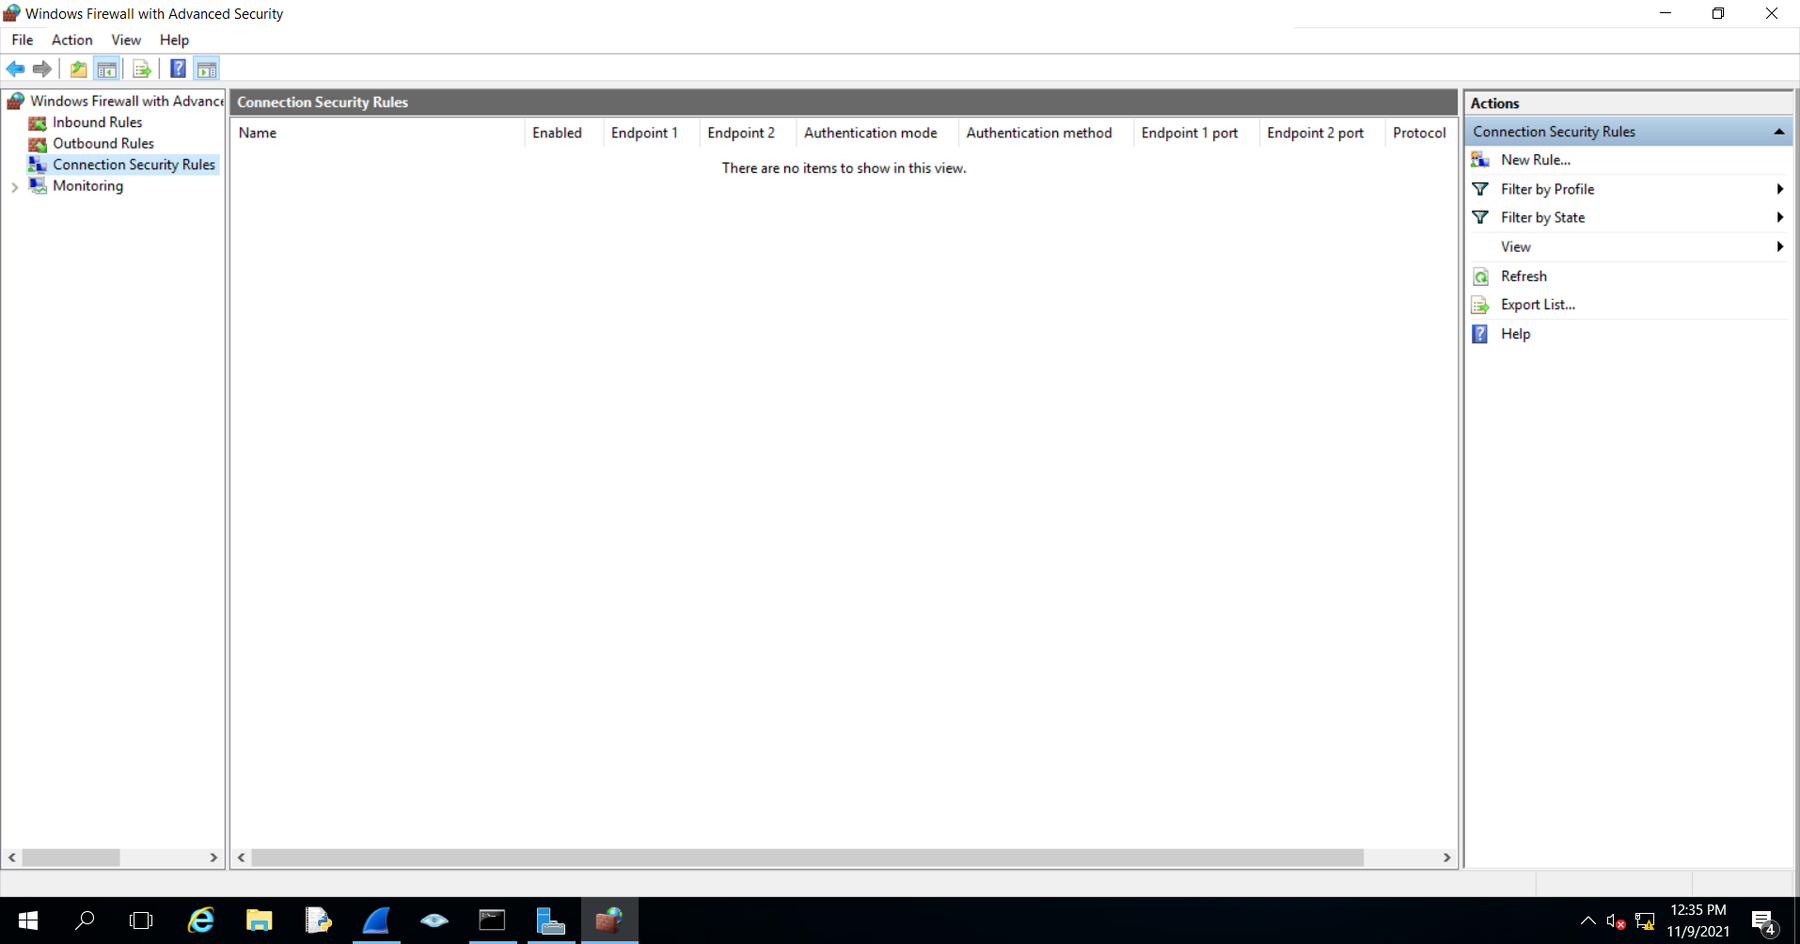
Let us navigate to the start menu and open “Windows Firewall with Advanced Security”.

We will open the Windows Firewall with Advanced Security, select Connect security policy from the left-hand side, and create a new rule on the right-hand side.
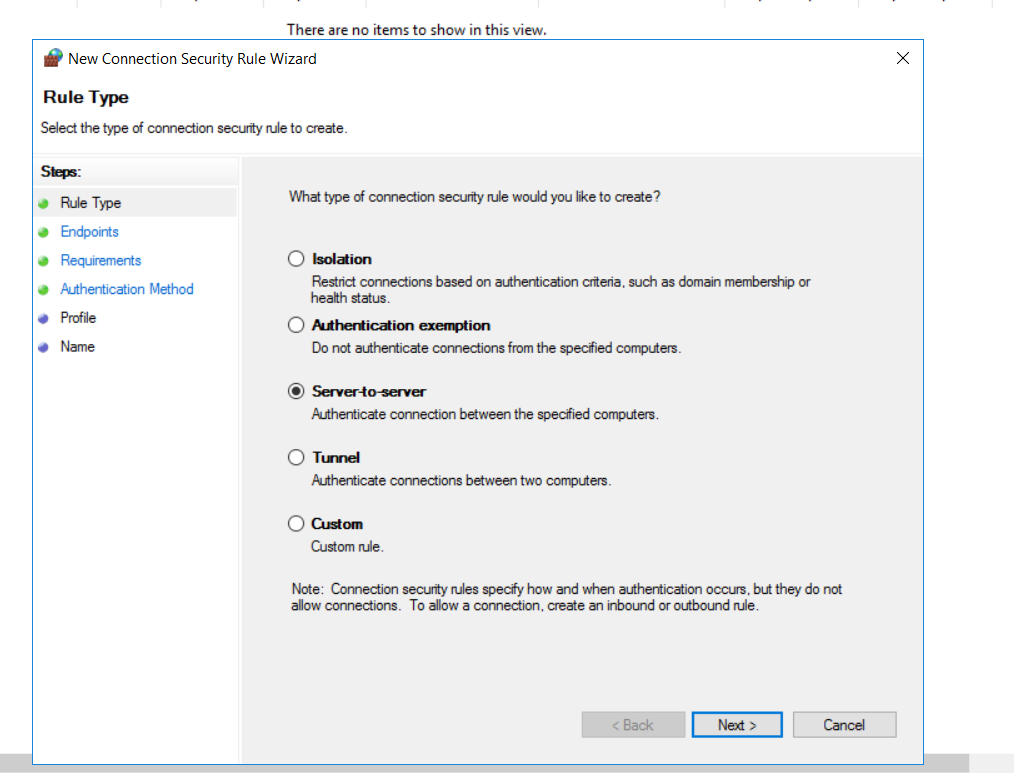
In the modal that appears, we will have five different rule options.
- Isolation
- Authentication exemption
- server-to-server
- Tunnel
- Custom
We will configure a server to server connection.
It will then ask us for the endpoints; we can select the two endpoints per the IP Addresses mentioned earlier.
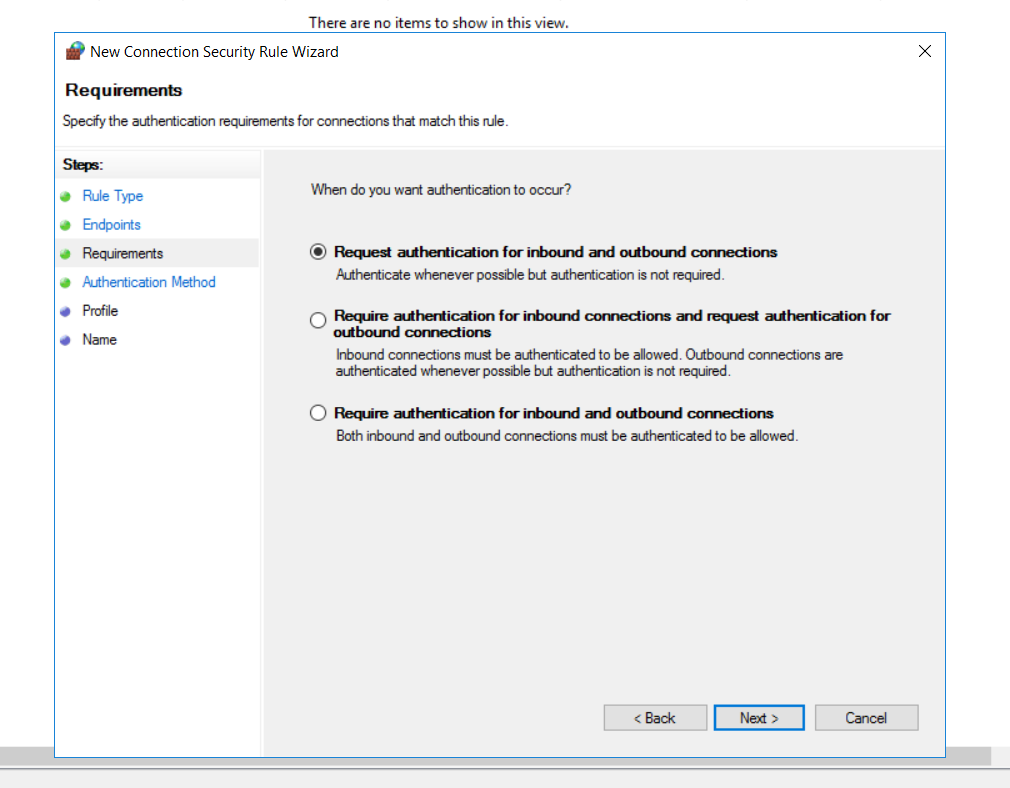
On the next screen, we are asked several options regarding whether we want to require or request authentication for inbound and outbound scenarios. We want to request authentication for inbound and outbound connections, but we will not require it for communication (It is nice to have, desired but not enforced).
On the following screen, we can set up an authentication method. As mentioned previously, we can see computer certificates as one of the authentication options. If we select the Advanced option and click customise, we will be taken to a screen to configure a customised advanced authentication method.

In this case, we will click to add the first authentication method and select the pre-shared key.
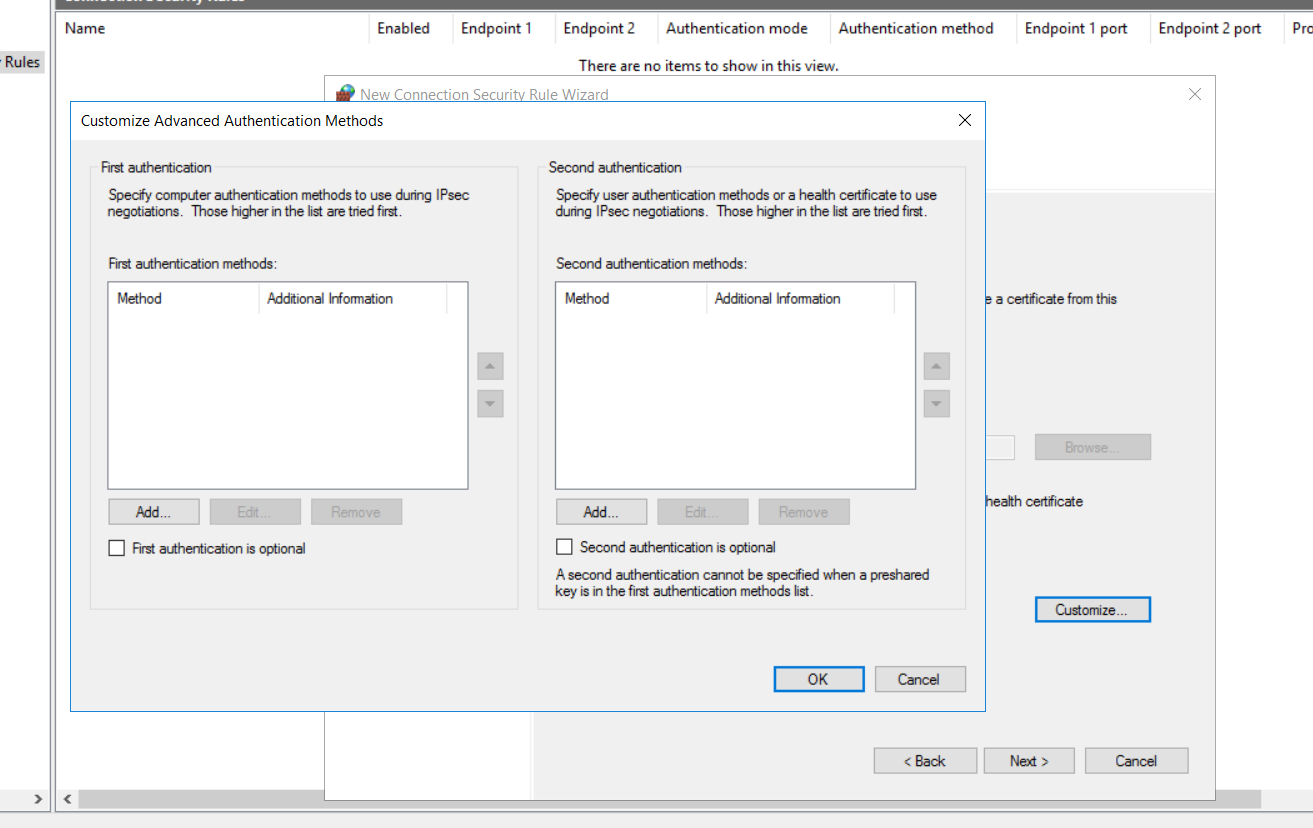
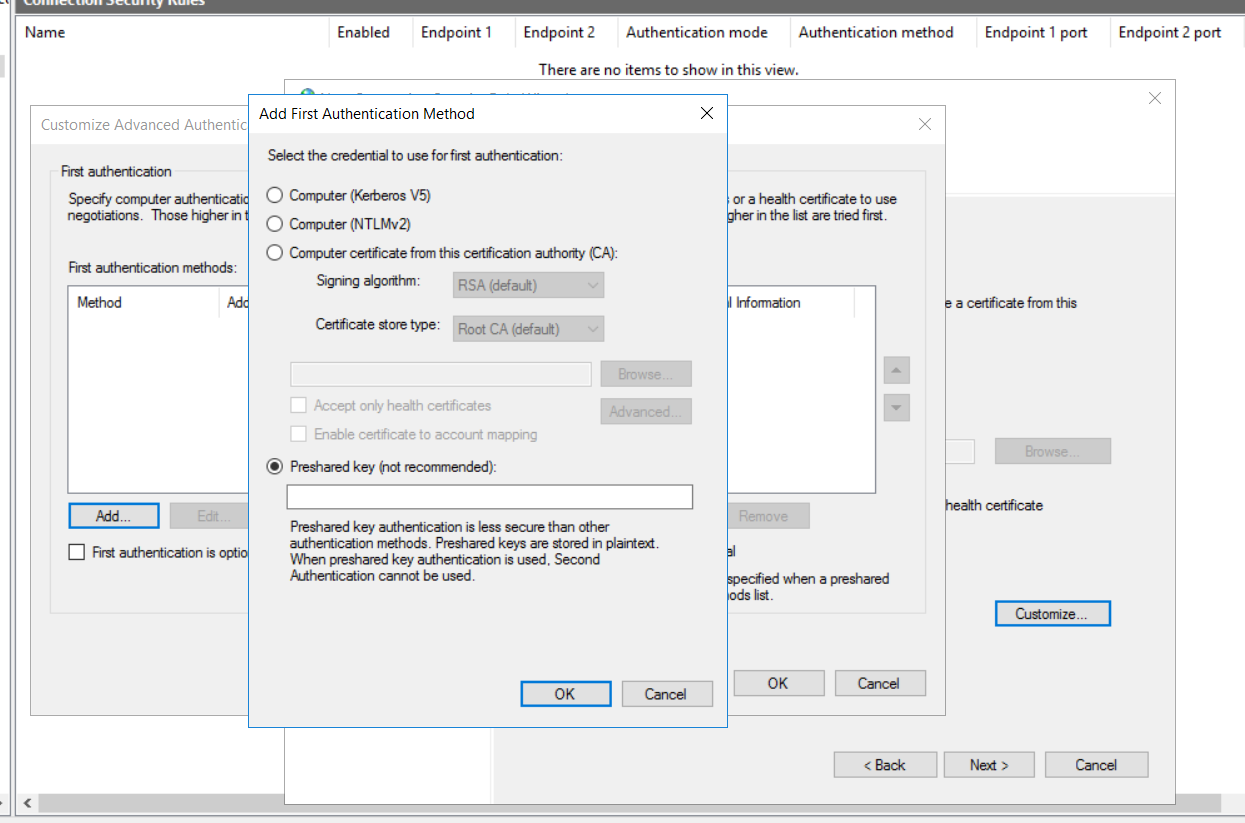
Pre-Shared Keys (as you can see from the warning) are not recommended; however, they are the easiest way to set up the configuration for our lab.
We will then click OK and OK again, then select next to move on to the next screen.
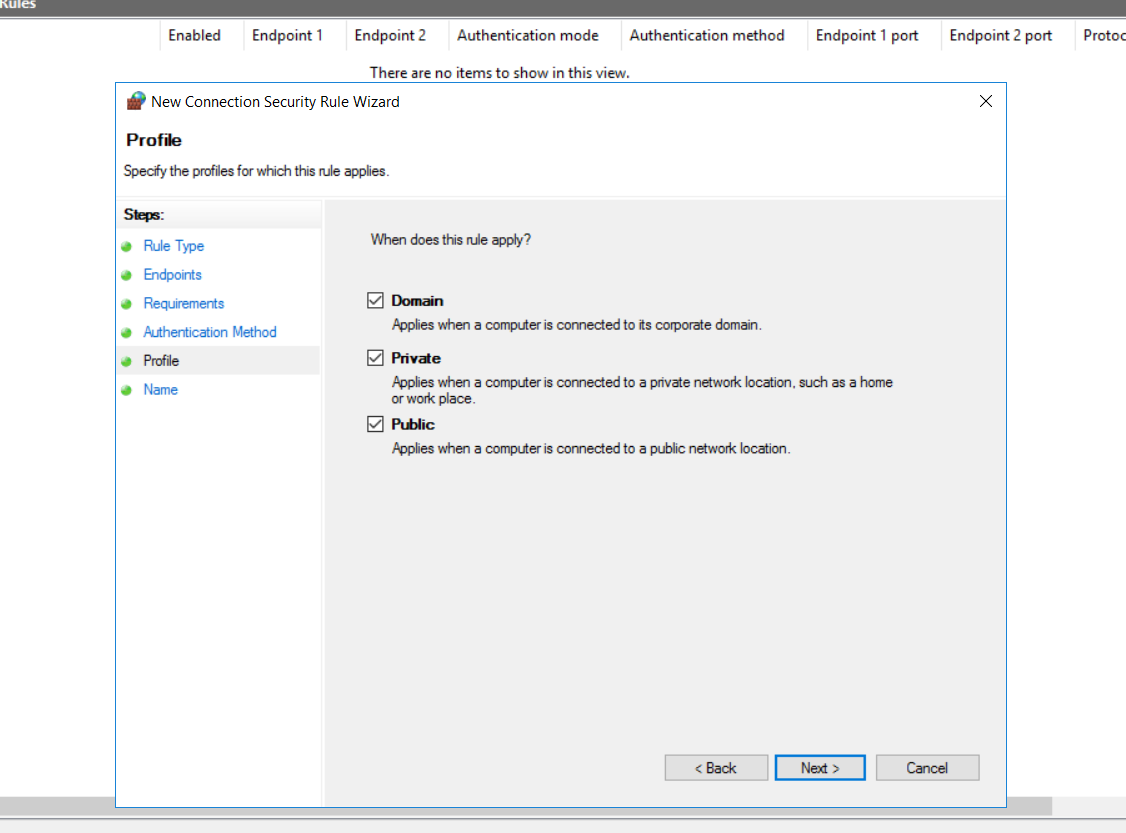
We will apply this rule to all types of networks, domain, private and public.
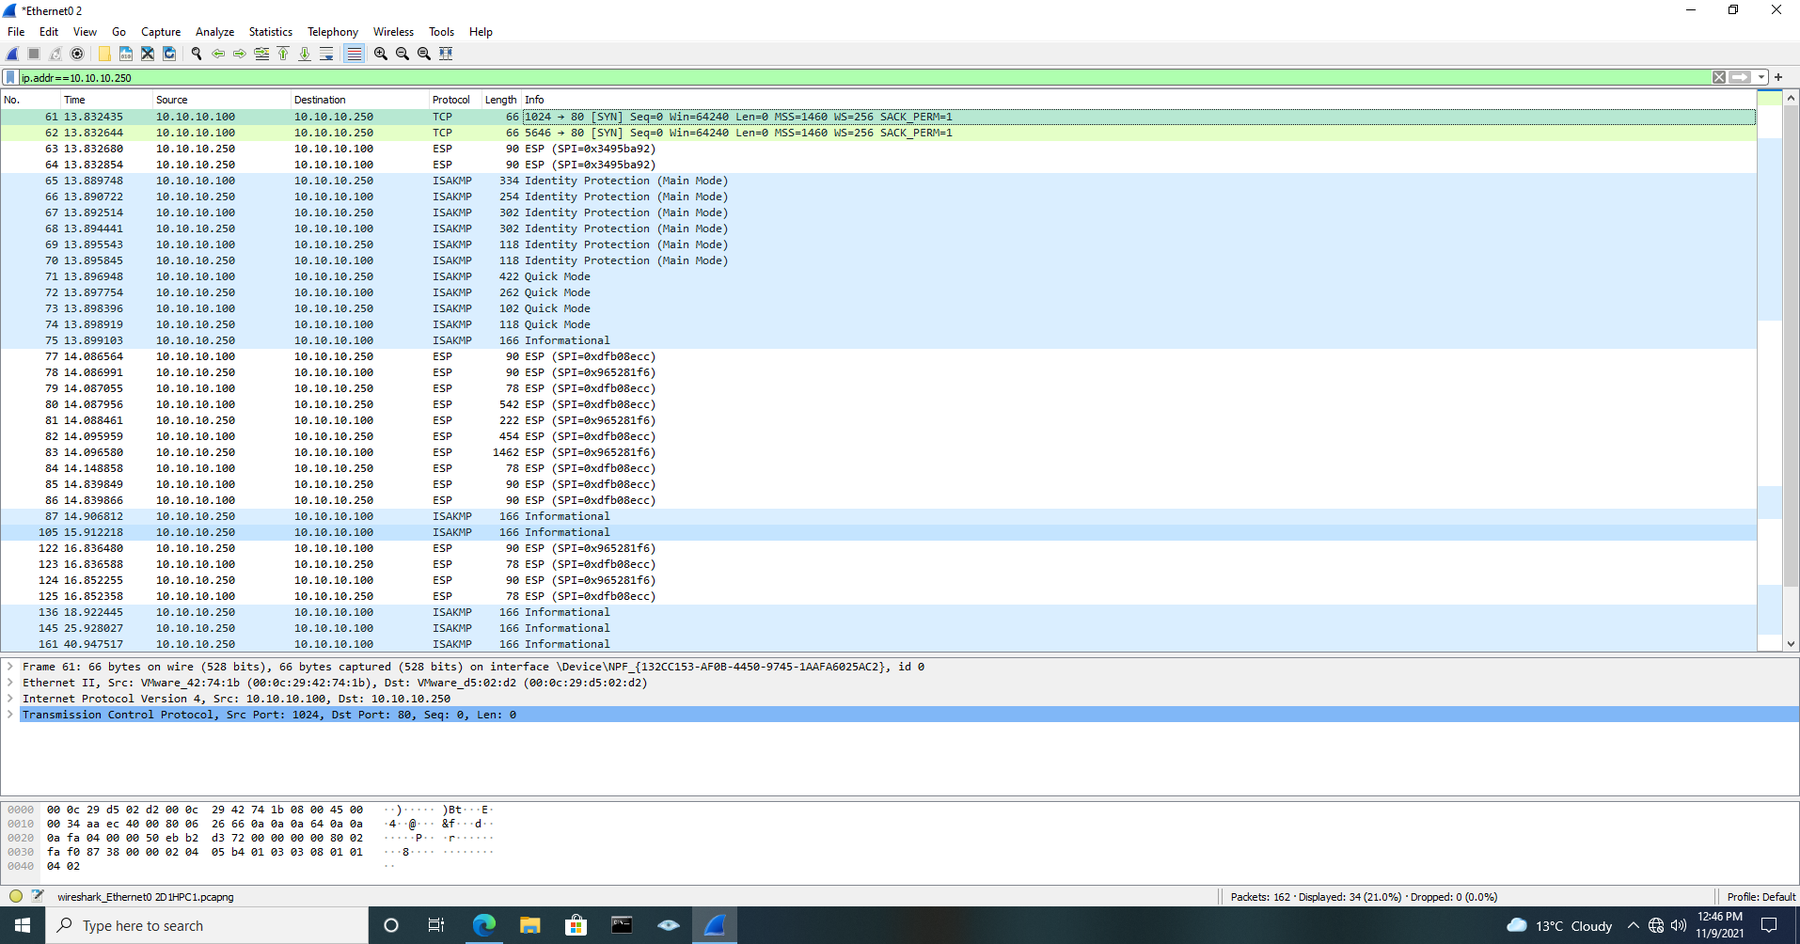
We will now refresh our browser connection and look inside Wireshark. Packets 61 and 62 show are initial connection on TCP port 80 and then shortly after we can now see the six packets that make up the “main mode” and the following “quick mode” packets.
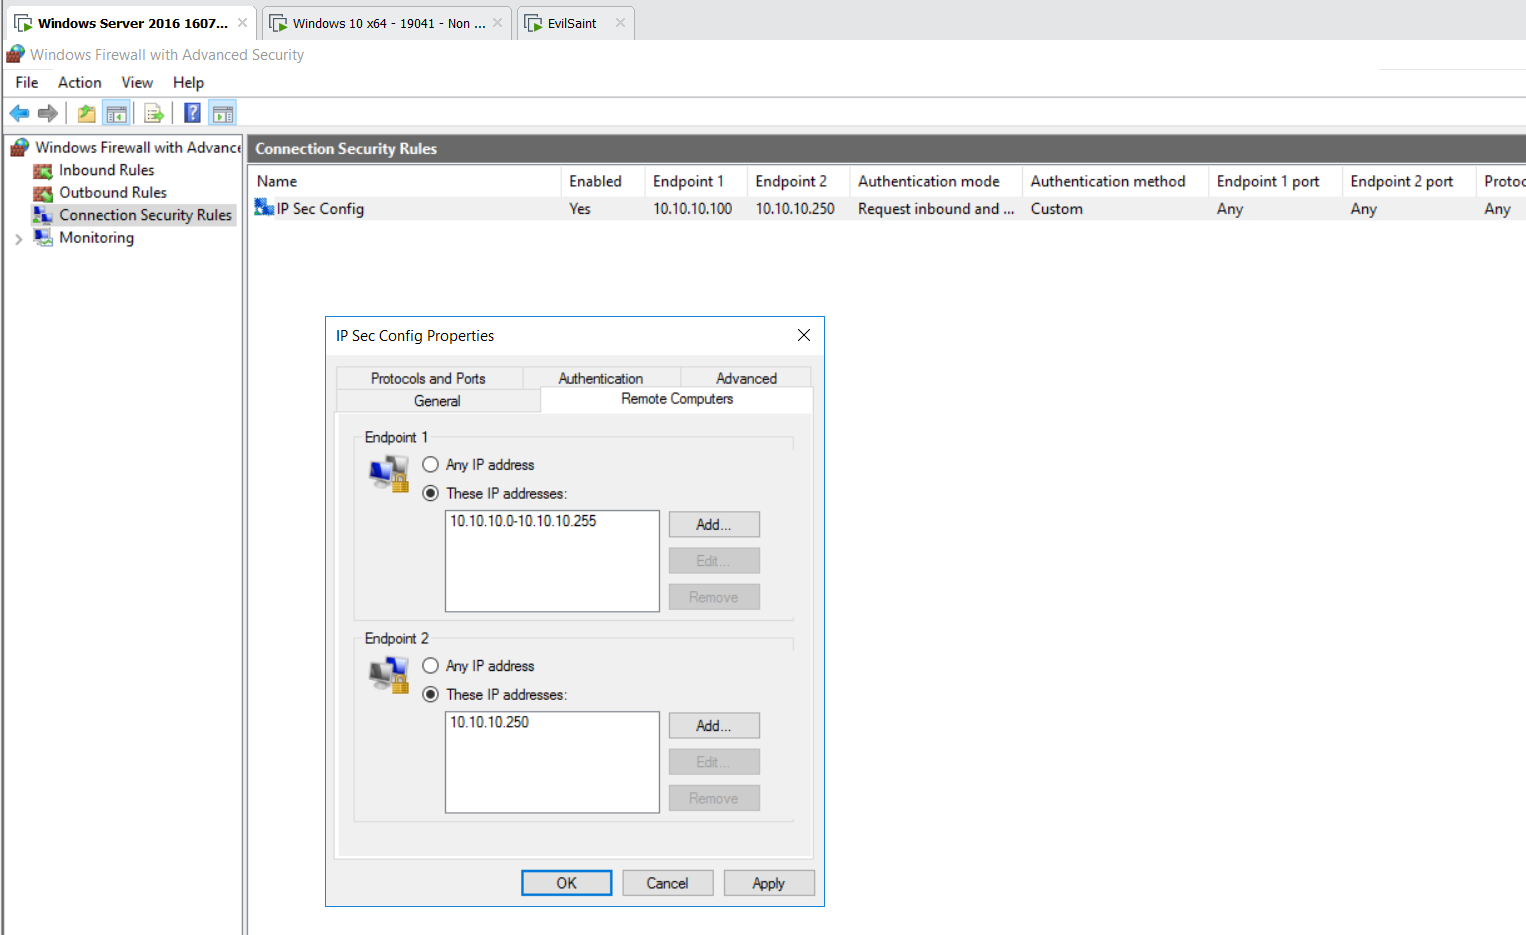
Because we have set up a secure connection between two endpoints, as shown in the following screenshots, we will not gain an IKE handshake as our testing machine cannot fall in the endpoint IP range.
However, if we set the endpoint range to be any in the following range, and we happen to be inside that range, then we might get some output that we can see from our penetration testing tools.
Using Ike-Scan
We can identify IPsec VPN points with Ike-Scan.
If we run ike-scan against our server with no arguments you can see if has negotiated a handshake and we can see the details of the SA
sudo ike-scan 10.10.10.250
Starting ike-scan 1.9.4 with 1 hosts ([http://www.nta-monitor.com/tools/ike-scan/](http://www.nta-monitor.com/tools/ike-scan/))
10.10.10.250    Main Mode Handshake returned HDR=(CKY-R=0cf85f1d8b3df6a4) SA=(Enc=3DES Hash=SHA1 Group=2:modp1024 Auth=PSK LifeType=Seconds LifeDuration(4)=0x00007080) VID=1e2b516905991c7d7c96fcbfb587e46100000009 (Windows-8) VID=4a131c81070358455c5728f20e95452f (RFC 3947 NAT-T) VID=90cb80913ebb696e086381b5ec427b1f (draft-ietf-ipsec-nat-t-ike-02\n) VID=4048b7d56ebce88525e7de7f00d6c2d3 (IKE Fragmentation) VID=fb1de3cdf341b7ea16b7e5be0855f120 (MS-Negotiation Discovery Capable) VID=e3a5966a76379fe707228231e5ce8652 (IKE CGA version 1)

Ending ike-scan 1.9.4: 1 hosts scanned in 0.008 seconds (129.87 hosts/sec).  1 returned handshake; 0 returned notify
For clarity we can add the -M option for multi-line mode to make it easier to read.
sudo ike-scan 10.10.10.250 -M
Starting ike-scan 1.9.4 with 1 hosts (http://www.nta-monitor.com/tools/ike-scan/)
10.10.10.250    Main Mode Handshake returned
        HDR=(CKY-R=eb5de8bbb1bcb7d6)
        SA=(Enc=3DES Hash=SHA1 Group=2:modp1024 Auth=PSK LifeType=Seconds LifeDuration(4)=0x00007080)
        VID=1e2b516905991c7d7c96fcbfb587e46100000009 (Windows-8)
        VID=4a131c81070358455c5728f20e95452f (RFC 3947 NAT-T)
        VID=90cb80913ebb696e086381b5ec427b1f (draft-ietf-ipsec-nat-t-ike-02\n)
        VID=4048b7d56ebce88525e7de7f00d6c2d3 (IKE Fragmentation)
        VID=fb1de3cdf341b7ea16b7e5be0855f120 (MS-Negotiation Discovery Capable)
        VID=e3a5966a76379fe707228231e5ce8652 (IKE CGA version 1)

Ending ike-scan 1.9.4: 1 hosts scanned in 0.008 seconds (120.63 hosts/sec).  1 returned handshake; 0 returned notify
If we just want to check the mode i.e. Main or Aggressive then we might want to use the --quiet flag to get rid of any superfluous SA information.
sudo ike-scan 10.10.10.250 --quiet
Starting ike-scan 1.9.4 with 1 hosts ([http://www.nta-monitor.com/tools/ike-scan/](http://www.nta-monitor.com/tools/ike-scan/))
10.10.10.250    Main Mode Handshake returned

Ending ike-scan 1.9.4: 1 hosts scanned in 0.007 seconds (151.15 hosts/sec).  1 returned handshake; 0 returned notify
In this example we have been fortunate to be able to negotiate an SA. However on another endpoint we might not be so successful. We can use the --trans flag to specify values that make up a custom transform.
sudo ike-scan 10.10.10.250 -M -v --trans=5,2,1,2
DEBUG: pkt len=84 bytes, bandwidth=56000 bps, int=16000 us
Starting ike-scan 1.9.4 with 1 hosts ([http://www.nta-monitor.com/tools/ike-scan/](http://www.nta-monitor.com/tools/ike-scan/))
10.10.10.250    Main Mode Handshake returned
HDR=(CKY-R=581954ce022c82e2)
SA=(Enc=3DES Hash=SHA1 Group=2:modp1024 Auth=PSK LifeType=Seconds LifeDuration(4)=0x00007080)
VID=1e2b516905991c7d7c96fcbfb587e46100000009 (Windows-8)
VID=4a131c81070358455c5728f20e95452f (RFC 3947 NAT-T)
VID=90cb80913ebb696e086381b5ec427b1f (draft-ietf-ipsec-nat-t-ike-02\n)
VID=4048b7d56ebce88525e7de7f00d6c2d3 (IKE Fragmentation)
VID=fb1de3cdf341b7ea16b7e5be0855f120 (MS-Negotiation Discovery Capable)
VID=e3a5966a76379fe707228231e5ce8652 (IKE CGA version 1)

Ending ike-scan 1.9.4: 1 hosts scanned in 0.007 seconds (135.19 hosts/sec).  1 returned handshake; 0 returned notify
We can lookup the values below
Encryption Algorithm Values
1 = DES 2 = IDEA 3 = Blowfish 4 = RC5 5 = Triple DES 6 = CAST 7 = AES 8 = Camellia
Hash Algorithm Values
1 = MD5 2 = SHA1 3 = Tiger 4 = SHA2-256 5 = SHA2-384 6 = SHA2-512
Authentication Method Values
1 = Pre-Shared Key 2 = DSS Signature 3 = RSA Signature 4 = RSA Encryption 5 = Revised RSA Encryption 6 = ElGamel Encryption 7 = Revised ElGamel Encryption 8 = ECDSA Signature 64221 = Hybrid Mode 65001 = XAUTH
Diffie-Hellman Group Values
1 = MODP 768 2 = MODP 1024 3 = EC2N 155 4 = EC2N 185 5 = MODP 1536 6 = EC2N 163 7 = EC2N 163 8 = EC2N 183 9 = EC2N 183 10 = EC2N 409 11 = EC2N 409 12 = EC2N 571 13 = EC2N 571 14 = MODP 2048 15 = MODP 3072 16 = MODP 4096 17 = MODP 6144 18 = MODP 8192
Anonymous
You're not logged in; your comment will be anonymous.
Log in here to post from your account, or via your social media account:
0 comments
